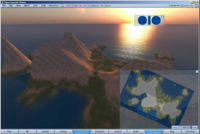
Cross-region terrain making with L3DT
From OpenSimulator
m |
m (Robot: Cosmetic changes) |
||
| Line 8: | Line 8: | ||
To resolve this you need to create a larger terrain map and then split it into tiles. | To resolve this you need to create a larger terrain map and then split it into tiles. | ||
| − | There are two ways to do this, either draw it by hand using a graphics package, or use a terrain generating tool as a starting point. You can just use the terrain generator to get started quickly although in reality you will probably end up mixing both techniques. The manual technique has been well described by Fu Barr in the [[ | + | There are two ways to do this, either draw it by hand using a graphics package, or use a terrain generating tool as a starting point. You can just use the terrain generator to get started quickly although in reality you will probably end up mixing both techniques. The manual technique has been well described by Fu Barr in the [[Terrain making]] article, so i will focus on the easy way. |
The principle reason why I wanted to start with a generated terrain is time - it takes a long time to draw your heightmap by hand so using the generator gives you a little kick start. It can also generate very realistic terrains which factor in things like age and erosion, in minutes rather than hours :) | The principle reason why I wanted to start with a generated terrain is time - it takes a long time to draw your heightmap by hand so using the generator gives you a little kick start. It can also generate very realistic terrains which factor in things like age and erosion, in minutes rather than hours :) | ||
Revision as of 18:54, 3 March 2012
This tutorial has been put together from several sources on the web it is aimed at region operators who want to make detailed cross region terrains quickly and easily.
It describes the generation of the terrain files needed to seamlessly fill a 2x3 region. Obviously you can adapt it to fit your specific requirements. Designing a terrain map for a single region is relatively straightforward, however if you want your region to span across a number of regions we are faced with a few challenges. The main one is seam-matching, in other words getting the edge of one sim to match the edge of the next. The inbuilt terraforming tools are quite good in OpenSimulator, however they struggle on region boundaries - thus you end up with jagged edges where the regions meet.
To resolve this you need to create a larger terrain map and then split it into tiles.
There are two ways to do this, either draw it by hand using a graphics package, or use a terrain generating tool as a starting point. You can just use the terrain generator to get started quickly although in reality you will probably end up mixing both techniques. The manual technique has been well described by Fu Barr in the Terrain making article, so i will focus on the easy way.
The principle reason why I wanted to start with a generated terrain is time - it takes a long time to draw your heightmap by hand so using the generator gives you a little kick start. It can also generate very realistic terrains which factor in things like age and erosion, in minutes rather than hours :)
Enjoy the tutorial and feel free to contribute/improve it -
The Objective
My objective is to create a 6 region heightmap based on the idea of an ancient volcanic archipelago. Thus I wanted a few islands with nice curved stretches of beach, some cliffs and drop offs and a higher regions. I already had in mind roughly what i wanted so that was a good start. I personally like islands because you get lots of terrain variation and the sunsets in OpenSim can be... well stunning :) It's very useful to have an idea in your mind of what you want before you start...
The Process
I used the L3DT Editor from Bundysoft, the standard edition is free and it does a great job of creating heightmaps, it generates nice and realisitc terrain- you can also drop in and fly around the terrain in a 3d view which will be familiar to OpenSimmers and great for previewing before you upload the regions. You can get the product here:
http://www.bundysoft.com/L3DT/downloads/standard.php
Generating your terrain files - The Design Map
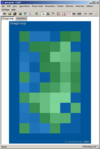
The first thing you will generate is a design map - this is a "blocky" representation of the landmass which means you can rapidly paint your terrain before you actually apply the terrain calculation.
1. Click "New Map" and choose the "Design/inflate (blank)" Algorithm
2. My desired region size is 2x3, which is 512m x 768m. Note that I set the horizontal scale to 1m
3. I then used the default HF/DM ratio of 64 - this allows you to roughly plot your land mass
4. Now the fun begins :) Click the edit icon to bring up the Design map brush - there's lots you can do here - you just have to experiment with the brushes... Personally I found the easiest method was to simply ignore all the other brushes and focus on the altitude brush. The design map starts at sea level, so I set the altitude to "-20" then hit "apply to all". From this starting point I built my islands up from there, keeping the altitude in the range of -20 to 44m. Remember it can be pretty rough to begin with as you can gradually build up the terrain to suit your needs.
7. After a bit of experimenting I found that the altitude tools on the designmap at 512x768 was a bit limited, so i decided to double the size of the map to give me more accuracy. I chose Operations > Design Map > Resize Design map, and increased the size to 1024x1536 which generated a new larger scale design map derived from the orginal - you can immediately see the improvement in accuracy. You could have started with the large scale initially, but by starting small you lets L3DT do much of the hard work for you. As you can see i then further tweaked the map to get the features i wanted.
Note: I kept a border of -20m all around my terrain file, this was for ease of adding new regions later on
Generating the Heightfield
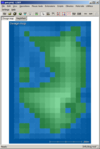
5. When you are happy with your design map, hit the calc button, choose Heightfield and watch l3DT do it's magic.
6. If it's not quite right, go back to your design map and tweak it, then hit calc again
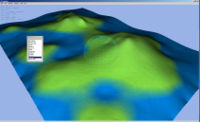
7. When you think you nearly have it thats a good time to head over into the 3d view. The system uses roughly the same movement controls as OS so it's pretty easy to get to grips with. Here you can "fine tune" your terrain features to get it closer to what you are looking for. Mouse Tools > Edit Active Map.
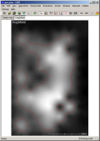
8. Close Sapphire and then use File > Export > Active map, use .PNG format - at this point I resized back to 512x768
Using the grids and snapping in your editor comes in very handy. I then use guides to show where the final cuts will be. Tio speed things up you can use "slice along guides" when you export to get the files you need.
Making OpenSimulator use the new terrain files
You need to now tell OpenSimulator to use the new terrain textures on your grid. For example: if you have 4 regions called Region1, Region2, Region3 and Region4... you need to add a section to your startup_commands.txt that looks like this:
   change-region Region1
   terrain load path_to_textures/terrain_for_region1.png

   change-region Region2
   terrain load path_to_textures/terrain_for_region2.png

   etc...
Note: you can also add Terrain commands here, but if you follow the instructions above you won't have to
Step 9. Restart your OpenSimulator instance and fine-tune your terrain height.
Notes
When you have your new terrain files loaded - make sure you disable the startup_commands, as every time you restart your server your terrain files will be re-uploaded, removing any in-game terraforming you have done
