Wifi
From OpenSimulator
Wifi - A Simple Account Management Front-end
"Wifi" stands for "Web Interface For... I" and is an add-on module that IS NOT IN THE CORE of OpenSim. It is provided by Diva Canto and can be added to OpenSim 0.7 onwards. Please do not ask the core OpenSim team for support.
Contents |
Introduction
Initial information is available from http://www.metaverseink.com/blog/?p=37 and is taken here pretty much verbatim for now...
Wifi provides an embedded Web application for handling user registrations. Wifi is a set of components that can be loaded up by both standalone simulators and Robust servers. It's features include:
- Account creation, optionally controlled by the administrator
- Configurable default avatars for new accounts
- Account updates by both users and administrator
- Account deletion by administrator
- Password recovery via email
- Simple user inventory management
- Welcome page which can be used as viewer -loginpage
Wifi has a few interesting properties that make it a good fit for small-to-medium OpenSimulator-based virtual worlds.
- First of all, it doesn’t require the installation of Apache or other Web servers; it’s all done within the OpenSimulator code base.
- Second, using the OpenSimulator code base brings many technical benefits. This isn’t an immediate benefit, but it is a benefit in the long run. Unlike the Apache-based Web apps that interface with the DB directly, Wifi interfaces with the OpenSimulator services layer using the core code, and therefore it is isolated from future changes to the OpenSimulator DB schema.
- Third, technically, Wifi is a set of components that can be loaded up by both standalone simulators and Robust servers.
Diva Distribution
Wifi is included and enabled by default in the Diva Distribution:
- Documentation: http://wiki.github.com/diva/d2/wifi
- Blog Description: http://www.metaverseink.com/blog/
- Downloads and binary distribution: http://github.com/diva/d2/downloads
- Source Code: http://github.com/diva/diva-distribution/
Adding Wifi to your OpenSim Setup
Additions to Standard OpenSim Distribution (from 0.7 onwards)
Binary Approach
Obtain the latest Wifi module distribution zip from http://github.com/diva/d2/downloads and place the files as instructed in the equivalent locations in your OpenSim directory.
bin directory
- add bin/Diva.Wifi.dll
- add bin/Diva.Wifi.ScriptEngine.dll
- add bin/Diva.OpenSimServices.dll
- for standalones, also add bin/Diva.Modules.dll
Copy WifiPages directory and its contents to OpenSim top level directory.
doc directory
- add in doc/WIFI.txt
Copy over the WIFI related readme, release notes and licence text files.
For grids, edit Robust(.HG).ini in section [Startup] to add 8002/Diva.Wifi.dll:WifiServerConnector to ServiceConnectors.
For standalones, edit StandaloneCommon.ini in section [Modules] to add WifiModule = true.
Add a new section [WifiService] from example at http://github.com/diva/diva-distribution/blob/master/addon-modules/Wifi/Wifi.ini.example to Robust(.HG).ini (for grids) or StandaloneCommon.ini (for standalones).
Source Code Approach
Get Diva Distribution which contains the Wifi modules from http://github.com/diva/diva-distribution/
Setting Configuration Parameters for a Grid
The complete example file is here: http://github.com/diva/diva-distribution/blob/master/addon-modules/Wifi/Wifi.ini.example
Additions to Robust.ini or Robust.HG.ini for Grids
[Startup]
    ServiceConnectors = "8002/Diva.Wifi.dll:WifiServerConnector"
Note that it will be usual to specify the port number to be accessible outside your firewall (normally port 8002) rather than the default Network Port for internal inter-component OpenSim traffic (normally port 8003) which can be set to only be accessible within a firewall.
[WifiService]
    GridName = "grid name"
    LoginURL = "http://<hostname>:8002"
    WebAddress = "http://<hostname>:8002"

    ;; The Wifi Administrator account
    AdminFirst = "Wifi"
    AdminLast = "Admin"
    AdminEmail = "you@example.com"

    ;; Do you want to be able to control grid registrations?
    AccountConfirmationRequired = false

    ;; Default avatars for new account registration
    ;; Syntax: AvatarAccount_<AvatarType> = "<FirstName> <LastName>"
    ;; Appearance and attachments are copied from avatar <FirstName> <LastName>.
    AvatarAccount_Female = "Female Avatar"
    AvatarAccount_Male = "Male Avatar"
    AvatarAccount_Neutral = "Neutral Avatar"

    ;; Preselection for default avatar in new account registration
    AvatarPreselection = "Neutral"

    ;; Variables for your mail server
    ;; Users will get email notifications from this account.
    SmtpHost = "mail.example.com"
    SmtpPort = "587"
    SmtpUsername = "your_account_in_this_mail_server"
    SmtpPassword = "your_password_in_this_mail_server"
Setting Configuration Parameters for a Standalone
The complete example file is here: http://github.com/diva/diva-distribution/blob/master/addon-modules/Wifi/Wifi.ini.example
Additions to config-include/StandaloneCommon.ini for Standalones
[Modules]
    WifiModule = true

[WifiService]
    GridName = "grid name"
    LoginURL = "http://<hostname>:9000"
    WebAddress = "http://<hostname>:9000"

    ;; The Wifi Administrator account
    AdminFirst = "Wifi"
    AdminLast = "Admin"
    AdminEmail = "you@example.com"

    ;; Do you want to be able to control grid registrations?
    AccountConfirmationRequired = false

    ;; Default avatars for new account registration
    ;; Syntax: AvatarAccount_<AvatarType> = "<FirstName> <LastName>"
    ;; Appearance and attachments are copied from avatar <FirstName> <LastName>.
    AvatarAccount_Female = "Female Avatar"
    AvatarAccount_Male = "Male Avatar"
    AvatarAccount_Neutral = "Neutral Avatar"

    ;; Preselection for default avatar in new account registration
    AvatarPreselection = "Neutral"

    ;; Variables for your mail server
    ;; Users will get email notifications from this account.
    SmtpHost = "mail.example.com"
    SmtpPort = "587"
    SmtpUsername = "your_account_in_this_mail_server"
    SmtpPassword = "your_password_in_this_mail_server"
Configurable Default Avatars
When users sign up, they can choose between default avatars. It's up to you to decide what these default avatars look like. Here is how you can configure them... Once your OpenSim is up and running, create accounts (using Wifi) with the names given in your configuration. With the above examples, these would be:
- Male Avatar
- Female Avatar
- Neutral Avatar
Then login to the world under each of those accounts, and set their appearances however you like. You can add prim attachments.
Problems with HTTP ports
The port used for the Wifi HTTP service is configurable. Usually this will be 8002 for a grid and 9000 for a standalone unless you use custom ports.
For a standalone you can do this by adding the "port" line for the port to use for Wifi and other services to the [Network] section of OpenSim.ini
[Network]
    port = 9000
Or for a grid specify a specific port (usually 8002) for the WifiServiceConnector in the ServiceConnectors list in the [Startup] section of Robust(.HG).ini
[Startup]
    ServiceConnectors="............,8002/Diva.Wifi.dll:WifiServerConnector"
In either case, define the equivalent WebAddress in the [WifiService] section of your StandaloneCommon.ini or Robust(.HG).ini (or addon-modules/Wifi/config/Wifi.ini if used in future).
[WifiService]
     WebAddress = "http://hostname:8002"
If you do not use the usual OpenSim service ports, please note that some network setups and ISPs will not allow HTTP to be served on port 80. It is usual to use an alternative port such as 8080 or a custom port in that case.
Wifi URLs When Operational
- Sample grid: http://yourgridhostname:8002/wifi
- Sample standalone: http://yourstandalonehostname:9000/wifi
- Local standalone: http://localhost:9000/wifi
Examples
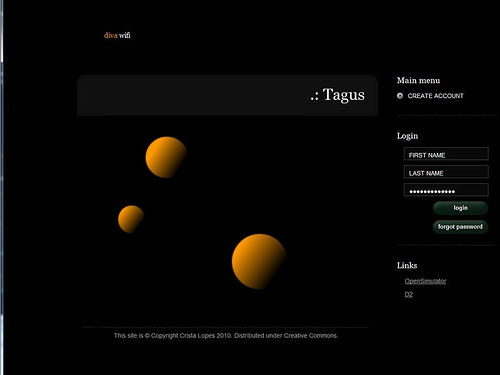
- Diva Tagus Test World (temporary August 2010): http://tagus.ics.uci.edu:9000/wifi
Wifi Administrator Functions
Manage Users
If authorisation is set to be on, you will receive an e-mail to the nominated admin account e-mail address if a user requests a new account and avatar creation. You can activate or delete new user creation requests. Users are notified of the activation via an e-mail to their nominated address.
You can also search for users and change their details. Give a space as a search term to select all avatars. Available are fields for "Level", "Flags" and "Title".
- Level = 0 is a normal user
- Level = 100 is a Wifi admin account user
You can manually reset a user's password by typiing into the password box and the nhitting the "Reset" button. Note that the user is NOT infromed of this password reset, so you must manually contact the user to communicate such a password change.
Note that the Wifi admin username/avatar is set in the Wifi configuration, and can be changed there. BUT.. once an admin always an admin. Well almost. If you change from one admin to another, the previous avatar still has administrator rights. You can remove Wifi administrator rights from an avatar by changing the "Level" of the user from 100 to 0 using the Manage Users facility in Wifi.
Manage Regions
Future functionality.


